


- 9 popular sizes, including 8.5" × 11" and 11" × 17"
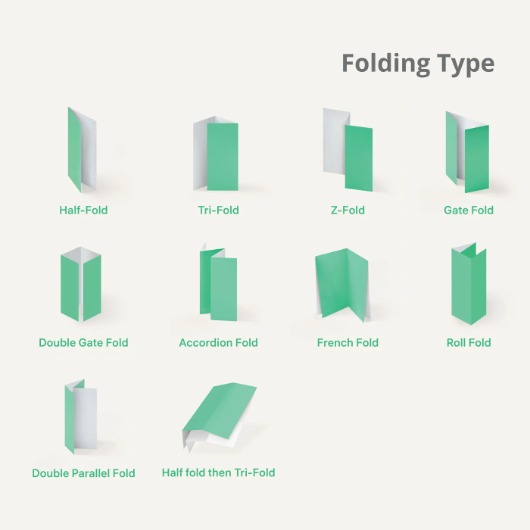
- 10 common folds: tri-fold, half-fold, accordion, and more
- Full-color printing with optional double-sided layouts
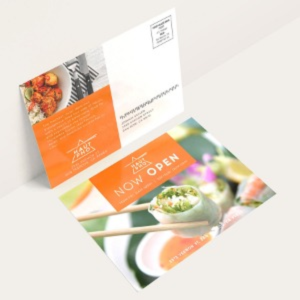
- Direct mailing available (250+ qty.)
- Order quantities from 25 to 100,000
- Fast turnaround options available (1-3 days)
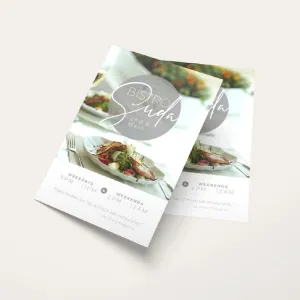
Brochures
Features
- 9 popular sizes, including 8.5" × 11" and 11" × 17"
- 10 common folds: tri-fold, half-fold, accordion, and more
- Full-color printing with optional double-sided layouts
- Direct mailing available (250+ qty.)
- Order quantities from 25 to 100,000
- Fast turnaround options available (1-3 days)
Maximize High-Quality, Organized Brochure Printing
Maximize High-Quality, Organized Brochure Printing
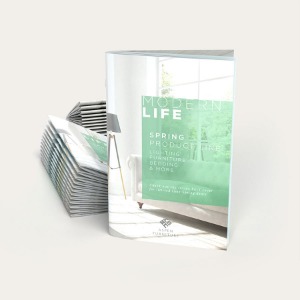
Brochure printing is part of every successful marketing campaign. Give away brochures at conventions, highlight details about your new collection, or include them with every new customer purchase. They are an effective, versatile, and affordable promotional tool.
It would help if you had a fold that complements your brand and brochure design. Please choose from our nine available brochure folding formats.
2-Panel Folds

Bi-fold
As its name indicates, this brochure contains two panels with enough space for lengthy text or large images.

Trifold
The trifold is folded twice to create three panels for a short, visual, and informative brochure. It is the most popular folding option.

Z-Fold
This commonly used brochure has six printed panels on both sides.

Gate Fold
The gatefold has two cover panels that open up to reveal a larger third panel.
4-Panel Folds
Four-panel folds are great for brochures that need to contain more information while still keeping them perfectly organized.

Accordion Fold
This brochure fold forms a zigzag pattern.

Double Gate Fold
This fold is similar to the gate fold, with an extra fold in the center. It is also known as a closed gatefold.

Double Parallel Fold
This fold is folded equally in half then folded again in the same direction.

French Fold
The French fold is folded in half horizontally and then vertically folded in half to create the four equally sized panels.

Roll Fold
Roll fold is folded three times from right to left. Each panel is directed to fold toward the left.
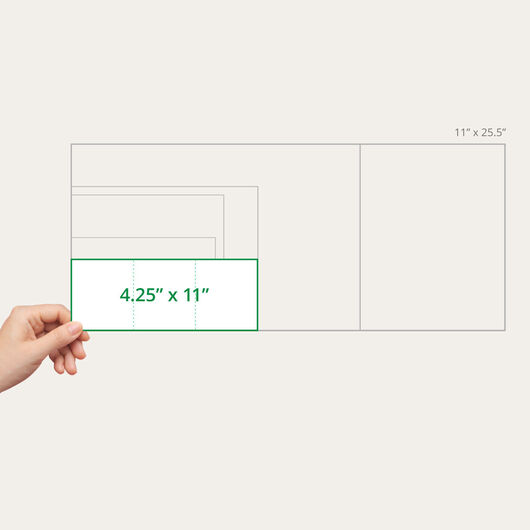
Brochure Sizes, Folds, and Sample Designs
The information you will include determines the brochure size suited for your business. There are five standard brochure sizes — which you can combine with five popular types of paper folds. It helps to create an outline of your content to have an idea of the size that best works with your material.


The final folded size of your brochure depends on the combination of: flat paper size, fold, and orientation (horizontal or vertical). We have blank brochure templates for standard brochures that you can download to guide you in creating a layout — or you can download the templates below.
We print brochures for you on three premium paper coating options. Glossy paper is vibrant, while the matte’s smooth surface is elegantly subdued. All brochures are printed on paper stock and 10 pt. cardstock is folded before printing.
You can upload a ready-made design or create your brochure with our design tool. Make a new design today and have the order shipped anywhere in the US. Start brochure printing for your marketing needs today.
Brochure Printing FAQs
We recommend that you observe the following design best practices to achieve color accuracy for your brochure:
- Create your design file using the CMYK color mode, which is the appropriate color mode for printed materials. If you find that your design file is set to RGB, convert it to CMYK first before sending it to your printer.
- Use ICC color profiles when designing. These profiles help translate colors correctly between your screen and the printing press.
- Calibrate your monitor regularly. Screen brightness, contrast, and color settings can affect how colors appear during proofing and a calibrated monitor helps ensure your design's colors are as accurate as possible.
- Review digital proofs carefully. However, note that doing it using a an electronic screen means you're viewing it in an RGB environment, which is not an exact representation of the final printed color.
- Request a hard copy proof if you want to see how the colors will actually look. This printed sample of your artwork lets you verify the colors before the full print run.
Expect slight color variation between your screen and the final print. Screens display colors using light (RGB), while printed colors are created using ink (CMYK), which can appear slightly duller or darker.
- Use high-resolution images with a minimum of 300 dpi and text elements with a minimum 400 dpi. Note that images and text of higher dpi help improve image quality but they also increase the file size, which may affect transmission between you and your printer.
- Match image size to print size. Don't enlarge small images as scaling up can cause pixelation.
- Use original images whenever possible, rather than screenshots or images downloaded from the web.
- Export your design as print-ready PDF with high-quality or press-quality settings.
- Review proofs at 100% zoom. Zooming the view beyond 100% may make images appear, while viewing it at 100% will give you an accurate picture of what your prints will look like .
Please be guided by the following reminders to minimize print defectson your brochure and achieve a professional print finish.
- Use high-quality, thick paper stock because these are less prone to cracking and tearing compared to thin, low-quality paper. You can rest assured that all of our paper stock and cardstocks are high-quality and deliver excellent print results.
- Brochures made with thicker cardstocks (10 pt. or higher) undergo scoring before folding. Scoring creates a crease in the paper for easier and more seamless folding and helps prevent the paper from cracking.
- Design folds carefully. Allow a safe margin near folds and avoid placing heavy ink or critical design elements along fold lines.
- Observe trim and bleed guidelines. Including proper bleeds and margins helps prevent smudging or misalignment. We require a 1/8" (0.125") bleed on all sides of your artwork and a 1/8" safe zone inside the trim line to ensure important elements are not cut off.
- Set your artwork or design to the final trim size before designing. For example, if your brochure is 8.5” x 11”, set your canvas to that exact size.
- Use proper bleed and margin settings. The bleed should typically extend 0.125” (1/8”) beyond the trim edge to prevent white borders, while important text and images should be kept at least 0.125” inside the trim line to avoid being cut off.
- Use design templates when possible. Brochure design templates for bifold, trifold, or other fold types help maintain proper panel sizes and alignment.
- Double-check fold lines and panels. Ensure text and graphics don’t cross fold lines unless intentionally designed to do so.
- Export your file as a print-ready PDF, and make sure the PDF matches the dimensions of your final brochure.
If you want your brochures to feel sturdy and look professional, use these guidelines when choosing paper stock:
- Pick the right paper weight. The recommended paper stock for brochures is between 80 lb. and 100 lb. These are sturdy paper stocks, they fold well, and they have a substantial feel that will make your brochure appear premium. You can also use thin cardstocks (10 pt. or 14 pt.) such as those used for printing postcards or business cards for a more supple brochure.
- Select the appropriate finish for your brochure. A gloss finish provides a shine that makes photos and colors pop, giving your brochure a high-quality feel. Meanwhile, matte or silk finishes offer a smooth, non-reflective, refined look, making text easier to read. These two are popular with brochures that are heavy on both text and images. Uncoated finishes have a natural, textured feel, which is ideal if you need to write on the brochure, though they appear less formal.
- Consider your brochure folds. Our machines can easily fold most paper stocks. If you're printing your brochure using thicker cardstocks (10 pt. or higher), we will add scoring to the paper to create a crease and prevent it cracking once it's folded.
Achieve proper brochure folds and correct alignment with these tips:
- Use a design template. Brochure design templates by your printer or design software have pre-configured panel widths for proper nesting (e.g., in a trifold, the inner panel is slightly shorter).
- Set correct margins and bleeds. Include a proper bleed of 0.125” (1/8”) beyond the trim edge to prevent white borders, and keep important text and images at least 0.125” inside the trim line to avoid being cut off.
- Pay attention to the layout. Avoid placing critical text or images directly on fold lines. Arrange content logically so panels flow well when opened.
- Check panel proportions. Ensure each panel is sized correctly for the fold type, especially if you're creating a trifold or Z-fold brochure.
- Print a test copy. Always do a test print on standard paper and fold it to verify alignment and content placement before approving the full print run.
Use high-resolution images (300+ DPI) and avoid enlarging low-resolution graphics. Keep text as vector elements and export your file in PDF CMYK color mode.
Choose heavier paper stocks such as 100 lb gloss text, 100 lb matte text, or 80 lb–100 lb cover for a sturdier feel. Heavier stocks create a more durable, premium brochure.
Use the official brochure template for your selected fold type. Templates show the correct panel sizes and fold sequence to prevent layout issues.
Size. Color. Material. It's all here, and more.
6 Paper/Stock Options

100 lb. Paper Gloss
- The most popular and highly recommended choice
- Thicker than a standard magazine page
- Gloss coating is smooth, shiny, and fade-resistant
- Great for artwork that has images and text
- Foldable and easy to keep for future reference
- Gloss coating comes with a shiny finish and prints colors in vivid detail
- Has a fade-resistant surface
.jpg)
100 lb. Paper Matte
- Thicker than a standard magazine page
- Matte softens colors for a more elegant look
- Less glare makes text easier to read
.jpg)
10 pt. Cardstock Gloss
- Durable cardstock that’s scored prior to folding
- Glossy finish provides vibrant coloring
- Scratch and scuff-resistant coating
.jpg)
10 pt. Cardstock Matte
- Durable cardstock that’s scored prior to folding
- Matte coating produces an elegant, muted hue
- Writable surface for ballpoint pens and permanent markers
.jpg)
70 lb. Paper Uncoated
- The thinnest and lightest paper stock available
- Thrice the weight of regular (20 lb.) copy paper
- Ideal for brochures with return forms
- Has a smooth, writable surface on both sides
.jpg)
80 lb. Paper Gloss
- Slightly thicker and heavier than 70 lb. paper
- Medium weight makes it easy to hand out
- Gloss coating brightens colors and adds shine
Brochure templates.
Save time by using our free templates. Our templates have been set up with proper bleeds and margins, assuring your print job turns out accurately. To download, select a file type and click on the size below. Note that all sizes indicated show the brochure measurements before folding.


About Hard Copy Proofs
UPrinting offers hard copy proofs for clients with color critical art. These color proofs are printed on our highly calibrated EPSON proofing system and are closest representation of the final printed pieces.
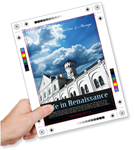
Hard Copy proofs are printed using Kodak Proofing Stock, which is different from the actual paper we will use when printing your order. While its main purpose is to show color, variations may occur depending on the finish selected (AQ, Matte, UV) for the final print job. We do not offer hard copy proofs for art that will be printed on uncoated paper.