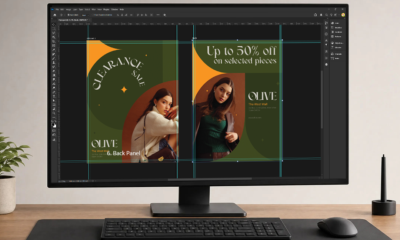
Custom packaging does more than protect your product—it shapes how customers perceive your brand from the moment they see it. Whether you're selling online, in retail stores, or at local markets, thoughtful packaging helps products arrive safely, reinforces your brand identity, and creates a memorable customer experience. The best part? Designing custom packaging doesn't always require a fully printed box. Small upgrades like custom labels, tissue paper, packaging sleeves, or inserts can make a lasting impression while staying within your budget.
This guide walks you through the packaging design process, from choosing the right packaging format to preparing print-ready artwork.
Why Packaging Design Matters
Your packaging is often the first physical interaction customers have with your brand. A well-designed package can communicate quality, build trust, and encourage repeat purchases before the product is even used.
Today's shoppers also pay closer attention to packaging than ever before. Consumers increasingly favor packaging that looks sustainable, uses only what's necessary, and minimizes unnecessary plastic. Clean, functional designs and eco-friendly materials can strengthen your brand image while meeting customer expectations.
Good packaging should:
- Protect products during storage and shipping.
- Make your brand recognizable.
- Clearly communicate important product information.
- Create an enjoyable unboxing experience.
- Encourage repeat purchases and word-of-mouth referrals.
Rather than thinking of packaging as an added expense, consider it part of your overall customer experience.
Step 1: Define the Purpose of Your Packaging
Before choosing colors, graphics, or materials, decide what your packaging needs to be accomplished.
Ask yourself:
- Will the package be shipped, displayed on retail shelves, or handed directly to customers?
- Does it need to protect fragile items?
- Is the goal to create a premium gift experience?
- Does the product require food-safe or moisture-resistant packaging?
Your answers will influence every design decision that follows.
Example: Let Your Packaging Reflect Your Brand

Custom box packaging for Plein De Vie. The female-owned and operated brand creates handmade roller ball fragrances infused with crystals, crystal infused bath bombs, and crystal soaps.
Plein De Vie's custom product boxes demonstrate how packaging can immediately communicate a brand's personality. Their elegant box complements their handcrafted bath and fragrance products, creating a premium first impression before customers even open the package.
What small businesses can learn: Your packaging should reinforce how you want customers to perceive your brand. Whether your style is playful, luxurious, minimalist, or handcrafted, your packaging should communicate that consistently.
Step 2: Understand Your Product and Your Customer
The best packaging balances what your product needs with what your customers expect.
Consider factors like:
- Product size and weight
- Fragility
- Storage conditions
- Shipping distance
- Customer demographics
- Purchase occasion (everyday use, gift, subscription, etc.)
For example, a skincare product may benefit from premium finishes and informative labeling, while an e-commerce apparel brand may prioritize lightweight mailers with a memorable unboxing experience.
When you understand both your product and your audience, it's much easier to choose packaging that looks good and performs well.
Step 3: Choose the Right Packaging Format
Custom packaging isn't limited to fully printed boxes. Many businesses start with simple branding upgrades before investing in more elaborate packaging.
| Packaging Option | Best For | Benefits |
|---|---|---|
| Product Boxes | Retail products, cosmetics, gifts | Premium presentation and product protection |
| Mailer Boxes | E-commerce shipments | Protects products while creating a memorable unboxing experience |
| Packaging Sleeves | Existing stock boxes | Cost-effective branding without replacing the box |
| Product Labels | Bottles, jars, food packaging, boxes | Affordable customization and product information |
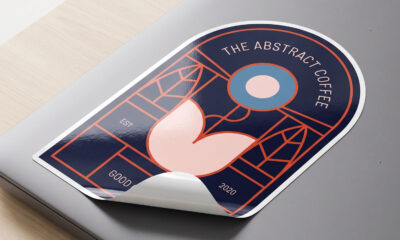
| Stickers | Seals, promotions, branding | Flexible and budget-friendly branding |
| Custom Tissue Paper | Apparel, gifts, boutiques | Protects products while enhancing presentation |
| Ribbon or Packaging Tape | Gift packaging and shipping | Adds polish and reinforces brand identity |
| Thank-You Cards and Inserts | E-commerce and subscription orders | Encourages repeat purchases and customer engagement |
Many growing businesses combine several of these elements to create a professional presentation without significantly increasing packaging costs.
Step 4: Plan Your Packaging Design
Once you've selected your packaging format, organize the information customers should see first.
Logo Placement
Your logo should be visible without overwhelming the overall design. Place it where customers naturally look first, such as the front panel or top of the package.
Product Name
Make the product name easy to find. Customers should immediately understand what they're purchasing.
Brand Colors
Consistent colors help customers recognize your products across different packaging formats and marketing channels.
Typography
Choose fonts that are easy to read at various sizes. Limiting your design to two or three complementary typefaces helps maintain a clean, professional appearance.
Product Information
Include any details customers need, such as ingredients, instructions, sizing, care information, or required regulatory labeling.
Images and Graphics
Photography, illustrations, and patterns should support your branding rather than compete with important information.
White Space
Not every surface needs to be filled. Leaving intentional empty space makes packaging easier to read and creates a cleaner, more premium appearance.
Interior vs. Exterior Printing
Exterior printing attracts attention, while interior printing can surprise customers with thank-you messages, patterns, or additional branding during the unboxing experience.
Website and Social Media
Include your website, QR code, or social media handles where appropriate to encourage future engagement.
Step 5: Choose Materials That Match Your Brand
Your packaging material influences both appearance and performance.
Popular options include:
- Paperboard for lightweight retail packaging
- Corrugated cardboard for shipping
- Kraft materials for a natural, eco-conscious look
- Gloss or matte finishes to reinforce your brand personality
When possible, choose materials that balance durability with sustainability. Right-sized packaging and recyclable materials can help reduce waste while appealing to environmentally conscious customers.
Step 6: Balance Presentation With Protection
Beautiful packaging should never come at the expense of product protection.
Consider adding:
- Custom tissue paper
- Protective inserts
- Dividers
- Cushioning materials
- Secure closures
Example: Protecting Products With Branded Tissue Paper
Bows and Ribbons wraps its products in custom tissue paper secured with ribbon. Beyond creating an elegant presentation, the tissue paper helps protect products from scratches and movement during transit.
What small businesses can learn: Protective materials don't have to be plain. Even practical packaging elements can reinforce your brand while improving the customer experience.
Step 7: Add Finishing Touches That Build Your Brand
Small details often leave the biggest impression.
Product Labels

Custom Lemon Thyme Macarons product label
Lemon Thyme Macarons pairs simple kraft boxes with custom labels and decorative ribbon. The clear window showcases the product while the label reinforces the brand without requiring expensive custom packaging.
Lesson: Even stock packaging can feel premium with thoughtful branding.
Packaging Sleeves

Stacked brown product packaging sleeves with logo
Made by Alana uses custom packaging sleeves to transform plain boxes into branded packaging. The sleeve features the company's logo and online information while maintaining a clean, cohesive design.
Lesson: Packaging sleeves offer an affordable way to customize standard packaging as your business grows.
Inserts and Thank-You Cards

Printed insert card inside product package
Tiny Human Supply Co. includes branded postcards inside its packaging to thank customers and promote future purchases.
Other popular insert ideas include:
- Discount codes
- Product care instructions
- Brand story cards
- QR codes
- Loyalty offers
- Product recommendations
These simple additions help extend the customer experience beyond the initial purchase.
Step 8: Prepare Your Artwork for Printing
Before placing your order, review your artwork carefully.
A print-ready design should:
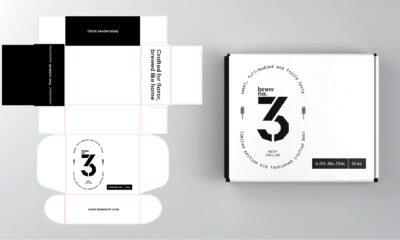
- Follow the packaging dieline.
- Include proper bleed and safe margins.
- Use high-resolution images.
- Use CMYK color mode for printing.
- Convert logos to vector format when possible.
- Proofread all text carefully.
Requesting a proof or sample before ordering larger quantities can help identify issues before production begins.
Common Packaging Design Mistakes to Avoid
Even great-looking packaging can fall short if basic design principles are overlooked.
Avoid these common mistakes:
- Choosing packaging that's larger than necessary.
- Prioritizing appearance over product protection.
- Using too many fonts or colors.
- Overcrowding the design with text.
- Forgetting important product information.
- Skipping the proofing process.
- Inconsistent branding across different packaging pieces.
Simple, functional packaging often creates a stronger impression than overly complex designs.
Final Thoughts
Effective custom packaging starts with understanding your product, your customers, and your brand. From selecting the right packaging format to choosing materials and refining your artwork, every decision contributes to the customer experience.
Remember that custom packaging doesn't have to begin with a fully printed box. Labels, sleeves, tissue paper, stickers, and inserts can all elevate your presentation while staying within budget. As your business grows, these thoughtful design choices can help your packaging become a recognizable extension of your brand—one that protects your products, communicates your story, and keeps customers coming back.