


- Easy application on different surfaces
- Long-lasting and fade-resistant design
- Durable, adhesive vinyl material
- Vibrant, 1-color and full-color options
Vinyl Lettering
Features
- Easy application on different surfaces
- Long-lasting and fade-resistant design
- Durable, adhesive vinyl material
- Vibrant, 1-color and full-color options
Get Custom Vinyl Lettering for Your Business
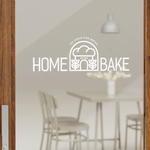
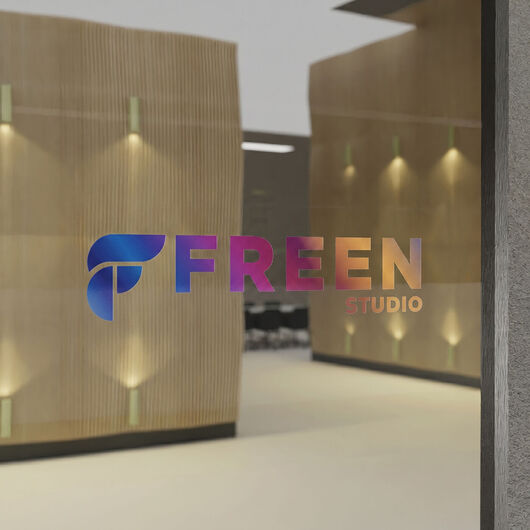
Our custom vinyl lettering makes it easy to turn your storefront windows and vehicles into eye-catching promotional materials. You can use the colorful vinyl lettering to promote sales, display store hours, or showcase your brand message in an eye-catching design that will attract customers.
You can customize your vinyl designs to fit your unique style. We now offer 1-color and full-color vinyl lettering with vibrant hues and sharp details. Whether you need lettering for promotional purposes, branding, or decorative accents, we'll give you accurate printing that will go properly to your storefront. Personalize your lettering design and let your message come to life with UPrinting!
Custom Vinyl Lettering With Your Brand's Colors
We offer custom size vinyl lettering
Simply input the width and height of your vinyl lettering on the configuration. Take note that the sizes are measured in inches.
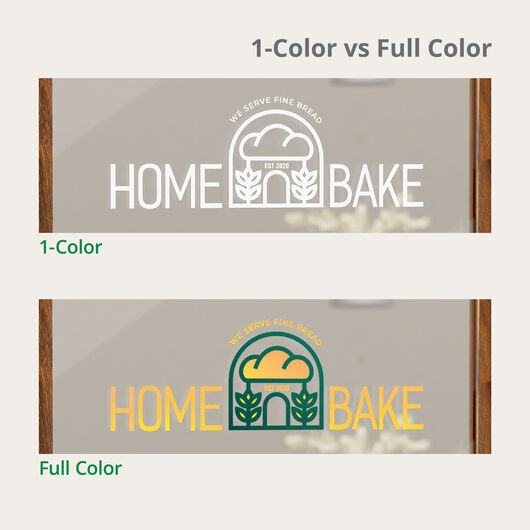
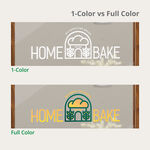
Maximize your color configuration
Full-color lettering will be printed according to your uploaded design. All available colors will be allowed for this option. The 1-color option lets you print your design in just one color, though you can choose the one color your artwork will come in.
Know your vinyl material
Full-color vinyl lettering will be printed on 3.2 mil adhesive vinyl, which is applied on the front surface of your windows. Meanwhile, the 1-color lettering is printed on a 2 mil adhesive vinyl, with either a standard or frosted design. The letters are on pre-mask tape for easier application.
This is what you’re getting
Orders start at one and you can order up to 100 copies of your vinyl lettering. (1 full design = 1 order). You can also get an optional squeegee for smoother application.
Vinyl Lettering Options
Vinyl letter printing is available in a variety of options that will make your design stand out. The kind of material you use, the type of cut you want, and where you put the decals can all make your business look professional. Below are the options for custom wall lettering.
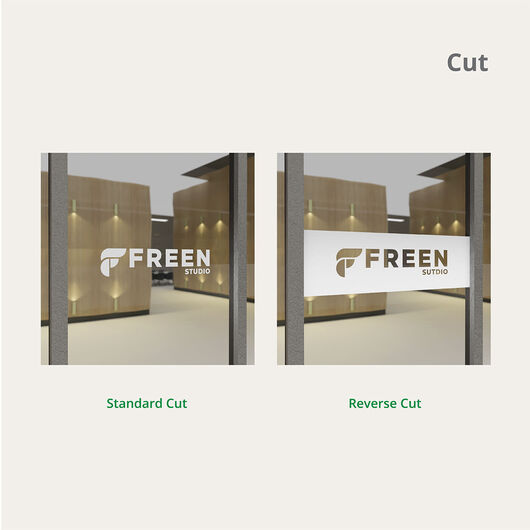
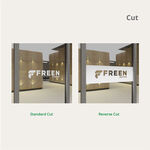
Types of Cuts
- Standard Cut – the vinyl is cut to the shape of your design
- Reverse Cut – the elements in your design will be cut out, leaving a solid background
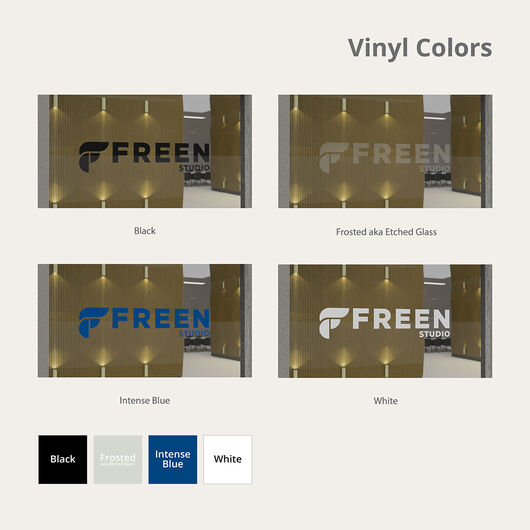
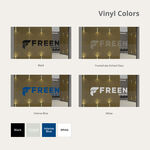
Materials
- 2 mil Adhesive Vinyl – This traditional vinyl material is ideal for solid backgrounds.
- 2 mil Frosted Adhesive Vinyl – This semi-transparent material offers privacy while letting enough light pass through.
- 3.2 mil Adhesive Vinyl – A thicker vinyl material option suitable for full-color designs and printing.
Sign Types
- Frosted Lettering – Cut from frosted adhesive vinyl, frosted lettering is reverse-cut to give an etched appearance on surfaces.
- Boat Lettering – This decal is pre-spaced for faster application of boat names, registration numbers, and ports of call signs. Cut from 2 mil adhesive vinyl, this decal is weatherproof, allowing your design to stand out even in harsh weather.
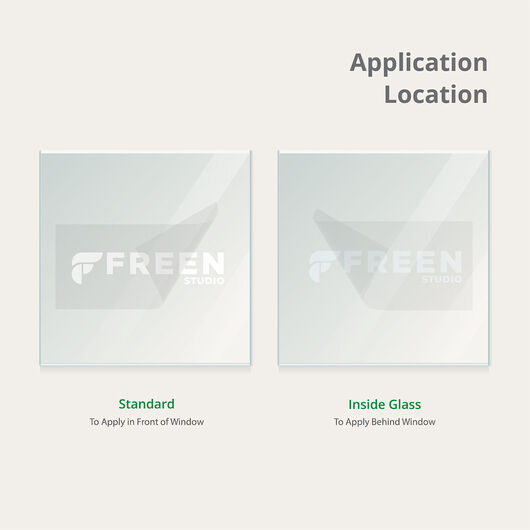
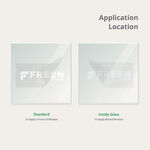
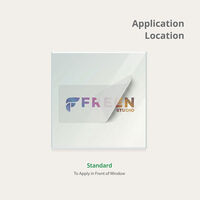
Application Location
- Apply behind window – The sticky side is on top of the decal.
- Apply in front of window – The adhesive is placed at the back of the design.
How to Install Vinyl Lettering
1. Clean and dry the surface where the lettering will be installed.

2. After measuring and marking your intended installation location if necessary, apply a horizontal strip of masking or painters tape to the top of the graphic with the top half of the tape on the intended surface, creating a hinge.

3. Hold the bottom edge of the hinged graphic away from the intended surface and remove the back liner (which is different from the transfer tape), revealing the sticky backing of your lettering or graphic. Be careful not to allow the exposed adhesive to touch the surface.

4. Using a squeegee*, apply pressure to the front or pre masked side of your lettering, placing the graphic onto the intended surface. Squeegee from left to right from the top down. If creases or bubbles develop, carefully lift the graphic and re-squeegee it. *Available for purchase with vinyl lettering.

5. Once in place without creases or bubbles, squeegee the entire lettering or graphic to ensure the adhesive is firmly attached to the surface.

6. Gently remove the pre-mask transfer tape, starting at a top corner. If any vinyl begins to come off the wall, use your squeegee to firmly adhere it back to the wall and continue peeling away the premask.

7. Laying the liner over the graphic with the shiny side facing you, apply hard pressure with the squeegee, removing any stubborn air bubbles.

Download or Print Vinyl Lettering Installation Instructions PDF.

About Hard Copy Proofs
UPrinting offers hard copy proofs for clients with color critical art. These color proofs are printed on our highly calibrated EPSON proofing system and are closest representation of the final printed pieces.
Hard Copy proofs are printed using Kodak Proofing Stock, which is different from the actual paper we will use when printing your order. While its main purpose is to show color, variations may occur depending on the finish selected (AQ, Matte, UV) for the final print job. We do not offer hard copy proofs for art that will be printed on uncoated paper.