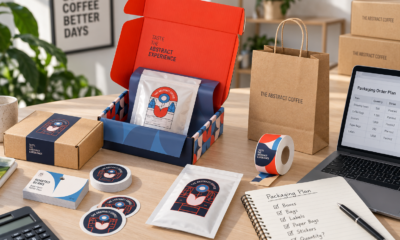
The right label size does more than make your packaging look good. For online sellers, it's the difference between a product that looks professional on arrival and one that raises doubts, all while keeping you compliant and giving customers the guidance they need to use your product with confidence.
Define the Label’s Purpose
Before you measure anything, get clear on what your label needs to do. Whether that's branding, compliance, instructions, or all three, its purpose determines the right size, shape, material, and design.
These are the most popular uses of labels for online sellers:
Fragile or Handling Labels: Inform handlers to manage packages with care to prevent damage.
Shipping Labels: Display the senders’ and recipients’ names and the tracking information for courier services. Their size should be compatible with industry-standard barcode scanners.
Product Branding: Display brand name, product name, logo, and other key details.
Product Information and Ingredients: Essential for displaying nutritional information, allergy warnings, expiration dates, and usage instructions. Commonly used in the food, beverage, and beauty industries.
Price Tags and Labels: Used to mark prices on items, often including barcode information.
Tamper-Evident Seals: Ensure the product has not been opened before purchasing. Often used in the food and consumer health sectors.
Promotional Labels: Highlight new features and special offers and sometimes include QR codes to direct customers to a landing page.
How to Measure the Container or Packaging Surface: A Step-by-Step Guide
Measuring the surface of a container or packaging where you intend to use a label is generally easy, and you can do it accurately with just a few simple tools. Here’s a simple guide you can follow:
1. Prep Your Tools
You only need three things to measure the surface you intend to label: a ruler (or a measuring tape for curved surfaces), a piece of paper, scissors, and a pen to mark the measurements.
2. Identify the Label Area
Do you need it for the side, front, or top of your product container or packaging? Whatever side you pick, make sure it has a flat, smooth section and does not have folds and ridges.
3. Measure the Width and Height
For flat surfaces, measure straight across the width and height using a ruler. But for curved surfaces, like bottles and jars, use a flexible tape to get the circumference.
Important Tip: Leave at least 1/8-inch (or 3 mm) margin from the edges to prevent wrinkles.
4. Create Paper Templates
Paper templates can help you visualize how your label looks and fits. You can make them by cutting a piece of paper (following the measurements of your container or packaging) and taping it onto the surface.
You may need to adjust dimensions until the paper template fits nicely. Scale down if you see wrinkles or folds.
Common Label Shapes and Their Uses
Label shapes aren’t just a style or branding choice; they affect fit and function as well. Certain shapes such as square, rectangle, circle, and oval are popular because they are versatile and fit standard boxes, bottles, jars, pouches, etc.
Rectangular labels are versatile and fit well on jars, boxes, or pouches. Wraparound rectangular labels are suitable for bottles and tubes.
Square labels offer a clean, centered look and often suit logo designs and ingredient panels.
Circles look good on lids, top seals, and price tags.
Ovals are generally a safe choice for jars, tubes, bottles, and other containers with a curved surface.
Although you can use custom-shaped labels for a more unique branding style, they generally cost more than standard shapes and sizes.
Standard Label Sizes for Common Packaging Solutions
These label sizes are commonly used across various industries because they fit standard product containers and packaging supplies.
- 2″ x 1″: Small jars, test tubes, and shelf tags
- 2.5″ x 3″: Lids for food containers
- 4″ x 2″: Larger boxes (especially front-of-package labels)
- 3/4″: Inventory coding and quick ID tags
- 2” x 3”: Water bottles
- 1.5″ x 1″: Small spice jars and sauce containers
- 2.5″ x 2″: 8 oz. jars
- 2″ x 4″: Wraparound labels for small sauce bottles
- 3″ x 2″: Product mailers
- 4″ x 3″: Subscription boxes
- 1″ circles or squares: Pricing labels
- 2.25″ x 1.25″: Barcode labels
You can check out this article to learn more about common sticker sizes and shapes for marketing and packaging.
Labels and Industry Compliance
Did you know that some industries follow strict label guidelines? For example, the US FDA has specific rules on typography, design, and font sizes for food labels to ensure that consumers can easily read the information about the products they want to purchase.
Check out this article about product label basics for online sellers to ensure your labels meet regulatory requirements.
You can also use this UPrinting Stickers and Labels Font Size Tool to ensure readability and compliance.
Conclusion
The right label size ensures a perfect fit, promotes readability, creates a strong brand aesthetic, and meets compliance with industry regulations. Additionally, it allows you to save on printing costs without skimping on the quality.
Ready to print stickers and labels that are perfect for online store packaging? UPrinting offers various options, including roll labels ideal for high-volume applications, as well as sheets and cut-to-size labels that suit smaller batches.